Growing pumpkins is a rewarding experience that can bring joy and satisfaction to any gardener. Whether you're a beginner or an experienced horticulturist, understanding the stages of pumpkin growing is essential for achieving success in your garden. Pumpkins are versatile plants that can thrive in various climates, but proper care and knowledge are necessary to ensure healthy growth and bountiful harvests.
As one of the most popular autumn vegetables, pumpkins are not only used for cooking but also for decorative purposes during holidays such as Halloween. The process of growing pumpkins involves several stages, each requiring specific attention and care. By following this comprehensive guide, you'll learn everything you need to know about planting, nurturing, and harvesting pumpkins.
This article will explore the stages of pumpkin growing in detail, offering practical tips and expert advice to help you cultivate thriving pumpkin plants. From selecting the right seeds to managing pests and diseases, we'll cover all aspects of pumpkin cultivation. Let's dive in!
Read also:Charli Damelio Nip Slip The Incident Reaction And Impact On Pop Culture
Table of Contents
- Introduction to Pumpkin Growing
- Stage 1: Planning and Preparation
- Stage 2: Choosing the Right Seeds
- Stage 3: Planting the Seeds
- Stage 4: Germination
- Stage 5: Early Growth
- Stage 6: Flowering
- Stage 7: Fruit Development
- Stage 8: Harvesting
- Stage 9: Post-Harvest Care
- Additional Tips for Success
- Conclusion
Introduction to Pumpkin Growing
Pumpkin growing is a fascinating journey that requires patience and dedication. As a member of the Cucurbitaceae family, pumpkins share similarities with other vegetables like cucumbers, squash, and melons. However, their unique growth patterns and requirements make them a special challenge for gardeners.
Understanding the stages of pumpkin growing will help you anticipate the needs of your plants and address potential issues before they arise. This guide will walk you through each stage, ensuring you have the knowledge and tools to succeed in your pumpkin-growing endeavors.
Stage 1: Planning and Preparation
Before you start planting, it's crucial to plan and prepare your garden. Proper planning ensures that your pumpkin plants have the best possible start.
Site Selection
Pumpkins require full sun to thrive, so choose a location that receives at least 6-8 hours of sunlight daily. Additionally, ensure the soil is well-drained and rich in organic matter. According to a study by the University of Illinois Extension, pumpkins grow best in soil with a pH level between 6.0 and 6.8.
Soil Preparation
Prepare the soil by adding compost or well-rotted manure to improve fertility and structure. Pumpkins are heavy feeders, so enriching the soil with nutrients is essential for their growth. Test the soil to determine its nutrient content and adjust accordingly.
Stage 2: Choosing the Right Seeds
Selecting the right pumpkin seeds is a critical step in the growing process. There are various pumpkin varieties available, each with its own characteristics and uses. Some popular varieties include:
Read also:Amanda Labollita Hlalbums Leak Unveiling The Truth Behind The Controversy
- Jack-o'-Lantern: Ideal for carving
- Sugar Pie: Perfect for baking
- Giant Pumpkins: Great for competitions
- Miniature Pumpkins: Suitable for decoration
Choose seeds based on your intended use and the space available in your garden. Consider purchasing seeds from reputable suppliers to ensure quality and germination rates.
Stage 3: Planting the Seeds
Planting pumpkin seeds correctly is vital for successful germination and growth. Follow these steps to ensure your seeds have the best chance of thriving:
Timing
Pumpkins are warm-season crops, so wait until the danger of frost has passed before planting. In most regions, this means planting in late spring or early summer. Refer to your local gardening calendar for precise timing.
Planting Method
Plant seeds directly into the ground or start them indoors for an early start. If planting outdoors, sow seeds about 1 inch deep and space them according to the variety's requirements. For indoor planting, use biodegradable pots to minimize transplant shock.
Stage 4: Germination
Germination is the process where seeds sprout into seedlings. Pumpkin seeds typically germinate within 7-10 days under optimal conditions. To encourage germination:
- Keep the soil consistently moist but not waterlogged
- Maintain soil temperatures between 70°F and 95°F
- Provide adequate air circulation to prevent mold
Once the seedlings emerge, thin them to ensure proper spacing and reduce competition for resources.
Stage 5: Early Growth
During the early growth stage, pumpkin plants develop their first true leaves and establish their root systems. This is a critical phase that requires careful attention to watering, fertilization, and pest control.
Watering
Water your pumpkin plants deeply and infrequently to encourage deep root growth. Avoid overhead watering, as this can lead to fungal diseases. Instead, use drip irrigation or water at the base of the plants.
Fertilization
Feed your pumpkin plants with a balanced fertilizer during the early growth stage. Once the plants begin to vine, switch to a fertilizer higher in potassium to promote fruit development.
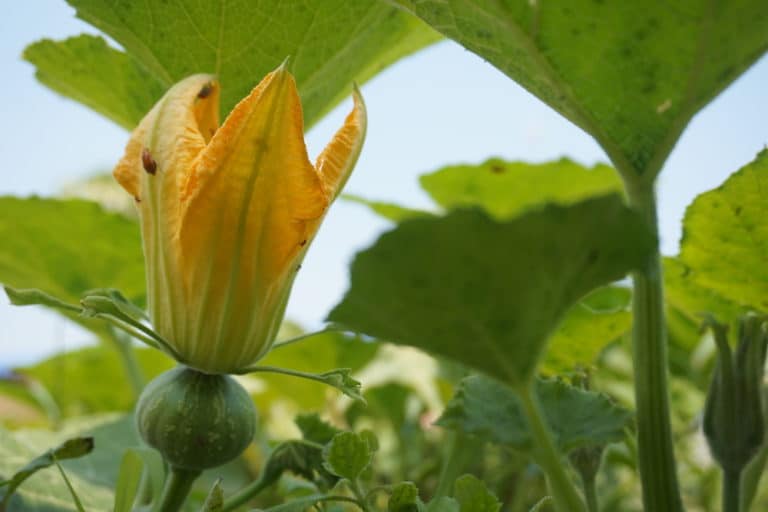
Stage 6: Flowering
Pumpkin plants produce both male and female flowers, which must be pollinated for fruit to develop. Encourage pollination by:
- Attracting pollinators like bees to your garden
- Hand-pollinating flowers if necessary
- Avoiding the use of pesticides that harm beneficial insects
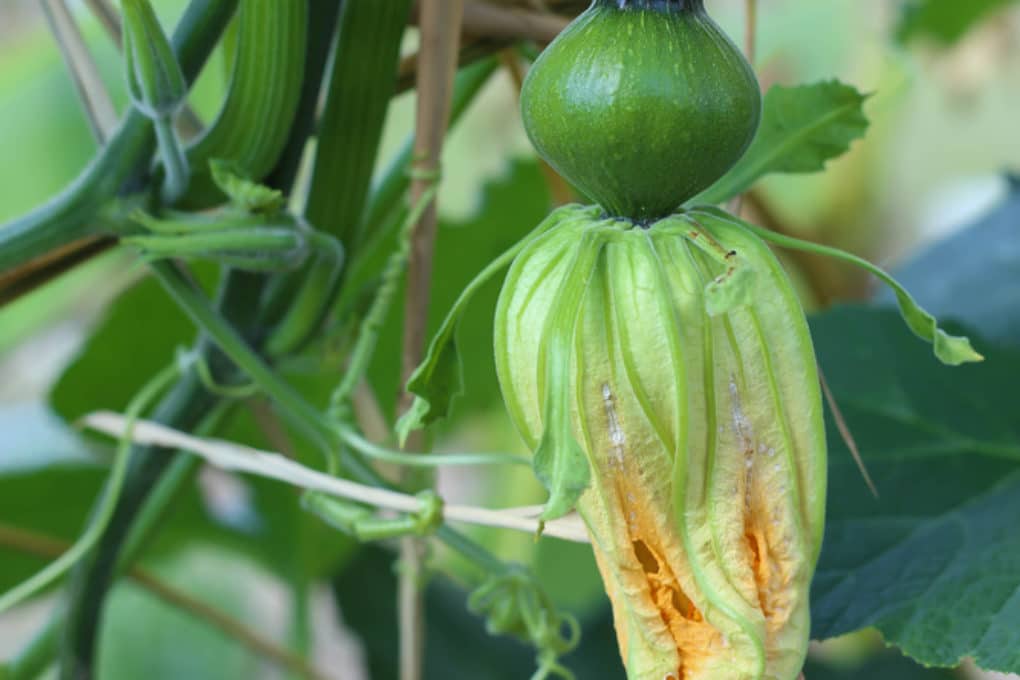
Male flowers usually appear first, followed by female flowers. Identify female flowers by their small fruit at the base of the bloom.
Stage 7: Fruit Development
Once pollination occurs, the pumpkins begin to develop. During this stage, focus on:
Nutrient Management
Continue fertilizing with a potassium-rich fertilizer to support fruit growth. Monitor soil moisture levels and adjust watering as needed to prevent fruit cracking or rot.
Vine Management
Prune excess vines to direct energy toward fruit development. Use stakes or trellises to support heavy fruits and prevent them from touching the ground, which can lead to rot.
Stage 8: Harvesting
Harvesting pumpkins at the right time ensures they reach their full potential in terms of size, flavor, and storage life. Look for the following signs of maturity:
- Firm, uniformly colored skin
- Hard rind that resists puncture
- Vines beginning to dry and turn brown
Use a sharp knife or pruners to cut the pumpkin from the vine, leaving a few inches of stem attached. Handle the pumpkins carefully to avoid damage.
Stage 9: Post-Harvest Care
After harvesting, pumpkins require proper curing and storage to maximize their shelf life. Follow these steps:
Curing
Place harvested pumpkins in a warm, dry location for 1-2 weeks to cure. This process hardens the skin and improves storage quality.
Storage
Store cured pumpkins in a cool, dry place with good air circulation. Ideal storage temperatures range between 50°F and 55°F. Properly stored pumpkins can last several months.
Additional Tips for Success
To ensure successful pumpkin growing, consider the following tips:
- Rotate crops annually to reduce disease and pest buildup
- Monitor plants regularly for signs of pests or diseases
- Experiment with different varieties to find your favorites
- Join gardening communities to share knowledge and experiences
Conclusion
Growing pumpkins is a fulfilling activity that combines science and art. By understanding the stages of pumpkin growing and following the tips outlined in this guide, you can cultivate healthy, vibrant plants and enjoy a bountiful harvest. Remember to plan carefully, choose the right seeds, and provide consistent care throughout the growing season.
We invite you to share your pumpkin-growing experiences in the comments below. Do you have any tips or tricks to add? Don't forget to explore our other gardening articles for more inspiration and advice. Happy growing!